• You can now help support WorldwideDX when you shop on Amazon at no additional cost to you! Simply follow this Shop on Amazon link first and a portion of any purchase is sent to WorldwideDX to help with site costs.
  • Click here to find out how to win free radios from Retevis!

HR2510 coil/glue problem

Lkaskel

Well-Known Member
Aug 4, 2017
420
349
73
60
Hi Everyone,
One the bench is an HR2510 that is getting a recap and nasty glue removal. Of course as things seem to happen the last coil L124 has a broken lead on it. Does anyone know of a source for replacements?

Also, for those of you that have removed the glue on these and other radios, what do you use in place of it. Hot glue does not seem to be a very good solution as far as I have experienced.

Thanks as always!!!
 

i use contact cement.

something like this:

1646371039293.png


I use the GC electronics Radio TV solvent to soften the glue so it can be removed.

always best to actually unsolder the part from the board as that sonybond usually creeps underneath them.

As for a replacement part, you might try contacting forum member Rogerbird1, as he works on a lot of these radios.
LC
 
  • Like
Reactions: NZ8N
i use contact cement.

something like this:

View attachment 57787


I use the GC electronics Radio TV solvent to soften the glue so it can be removed.

always best to actually unsolder the part from the board as that sonybond usually creeps underneath them.

As for a replacement part, you might try contacting forum member Rogerbird1, as he works on a lot of these radios.
LC
Thanks LC!!

I agree with the unsoldering 1st rule. I generally like to remove the part before trying to separate the glue from it. On this particular coil it came out fine but when I separated the glue one of the leads came with it. I cant tell if the glue weakened it or if I just broke the lead but.....it's broke. I did message Rogerbird and asked him. We shall see what he comes up with. One other note on this radio. The caps in the PLL board do not come out as easy as I would have hoped. The solder on the negative lead travels up to the top of the board. It's a challenging thing trying to use as little heat as possible to protect the board but still enough to melt the solder to the top.
 
sounds like a double sided plated through PC board.

To remove parts from boards like this, you really need to have a desoldering iron.
using the squeeze bulb, or solder wick, or the plastic solder sucker can lead to problems.

these PC boards have a little metal sleeve that connects the hole on the bottom of the board to the hole on the top of the board, and if you don't get all the solder out of the hole, when you go to pull the part out, you'll pull the sleeve out with it.
you'll see it on the component lead.
ask me how i know this LOL.

Having a desoldering iron that will heat the trace, and being able to just push a button to suck out all the solder is night and day different than the other methods.

now, not everyone is going to be ready and able to drop the coin for one of these irons, so there is a method that can work, but i will warn that the possibility of trace damage is still there.

the idea is to 'rock' the part out of the board by putting your soldering iron on one trace, leaning the part over the other direction to raise the lead up into the board a bit, then move over to the other component lead and lean the part the other way.
moving back and forth you will eventually have one lead come out the top of the board, and then you can heat the remaining lead and pull the part.

HOWEVER!
you have to be careful and let the solder cool in the hole that you just heated before you move over to the other hole, because if you don't, when you go to lean the part over, you'll push the lead back through toward the bottom of the board and possibly lift the trace up.

if you do accidentally pull the sleeve out, you can just mount the new part so that there is some lead showing on the top of the board, and then just get some solder on the top of the component lead as well as on the bottom.

hope that helps.
LC
 
That is such a good reply!!! Actually, I do use an Aoyue de-solder station. Even with the station it does not seem to pull all of the solder out. I use the method you mentioned by heating one pad and tilting the cap, letting it cool and then the other side until I can fully remove it. Then I add new solder on the board and I've found that wick seems to to remove the solderin this case better. I am being a little extra careful to not over heat the area so that may be why I am having some trouble.

Thx again!!
 
I started to use Wedwood Contact Cement, but it mimicked sonybond so much that I didn’t want to cause confusion for any tech in the future. I now use hot glue. The only issue I have with it is getting rid all the Cotton Candy it produces.

Another minor issue I had with Wedwood was the cap seal sticking to the glass rim. The only way to avoid the problem was to clean the rim and seal afterwards, but that didn’t always help either.
 
  • Like
Reactions: NZ8N
I have seen a couple 2510 radios with the Chipswitch installed that had faults out of the gate because they have pulled the sleeve out on through-plated holes removing the factory CPU.
Pain in the ass if you are not careful.

73
Jeff
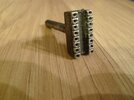
Heat it properly and all go smooth. Put excessive amount of solder and heat all legs at the same time. Pretty simple with hotair or special tool similar to this:
 

Attachments

  • 6349848400_1453399292.jpg
    6349848400_1453399292.jpg
    173 KB · Views: 0
With some practice you will get pretty good at winding coils. You can't buy them. With the right size wire they can be maid. Don't be scared. The first time someone told me I have to wind my own I thought I can never do this. Sometimes you do not get something just right and have to do it again. Remember use coated magnet wire.
 
I started to use Wedwood Contact Cement, but it mimicked sonybond so much that I didn’t want to cause confusion for any tech in the future. I now use hot glue. The only issue I have with it is getting rid all the Cotton Candy it produces.

Another minor issue I had with Wedwood was the cap seal sticking to the glass rim. The only way to avoid the problem was to clean the rim and seal afterwards, but that didn’t always help either.I

I use hot glue also and have never had a problem. And with a little hot air it is easily removed.
 
With some practice you will get pretty good at winding coils. You can't buy them. With the right size wire they can be maid. Don't be scared. The first time someone told me I have to wind my own I thought I can never do this. Sometimes you do not get something just right and have to do it again. Remember use coated magnet wire.
What gauge wire do you use for these types of coils?
 
For L135 and L136 I use 24 AWG. Just a note it is hard trying to do this with a single color wire. I have not found anything that I can color the second wire with. Paint, Sharpie or Nail polish rubs off. For L34 I use 27 AWG. And for L24 I use 30AWG. It is a bit hard doing L124 with 27 AWG.
Also 30 AWG works on the 148 GTL.
 
  • Like
Reactions: Klondike Mike
Ok, so I just ordered a spool of copper and red 30 gauge magnet wire. I now need a bionic eye to see the coil well enough to wind it. I'll report back in a week or so once the wire gets here.

Thanks for all of your help!!
 

dxChat
Help Users
  • No one is chatting at the moment.