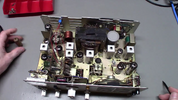
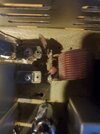
I may also add that every tube in this radio is now new and the unit behaves the same so I guess I will be looking further into it, I have ordered a Sam's manual to help with it hopefully! I do have to wonder if whatever is causing it not to power up with 12 volts is also causing the low wattage output when operated on a AC power cord ?
You are using an out of date browser. It may not display this or other websites correctly.
You should upgrade or use an alternative browser.
You should upgrade or use an alternative browser.
-
You can now help support WorldwideDX when you shop on Amazon at no additional cost to you! Simply follow this Shop on Amazon link first and a portion of any purchase is sent to WorldwideDX to help with site costs.
-
A Winner has been selected for the 2025 Radioddity Cyber Monday giveaway! Click Here to see who won!
Beutiful Robyn T-240D " Yellow Bird" with very low TX issue, please help
- Thread starter Danzik
- Start date
I was thinking the am power and modulation adjustments were at the bottom of this unit but are they actually on the top? Are these screws VC 901 and VC 902 ???? I found these screwed down all the way, I backed them off now I have my 4 watts the radio is fixed Kind of a dismal proposition. Changing tubes can affect internal adjustments that are supposed to be "peaked", or tuned for max signal. Those adjustments are there in part because manufacturing tolerances in the tubes will change where the peak setting of an adjustment should be. Just changing one good tube for another good tube can reduce performance, either in the receiver or transmitter. Not because the new tube is bad, but only because it's a bit different on the inside of the tube. Once that adjustment is reset to match the new tube, the old performance comes back.
The really-bad news about this radio is that those adjustments are mostly locked down with a white enamel paint dribbled onto the threaded adjustment slugs. Inserting the non-metal hex tool into an adjustment slug won't make it move, but will crack it if you turn the tool with enough force. Once that happens, turning the tool again just forces the cracked halves of the slug against the inside of the threaded form. Kinda like the centrifugal clutch on a go-kart. Solvents can loosen the white glop, but they tend to soften the glue holding the coil to the inside of the can. When that happens, turning the alignment tool spins the innards around inside and severs the wires. Bad juju, that.
Like "my car won't go over 20 miles per hour". More than one possible cause. No simple way to pin that down sight unseen.
Troubleshooting requires some resources. If you don't have access to a tube tester, you can tryi a known-good tube one at a time for each of the tubes in the transmit side. This only works if you have good spares on hand.
The calibrated eyeball is the one tool you probably have. A bright light on the circuitry under the transmit tubes can reveal parts that are visibly scorched or discolored.
A schematic diagram with DC voltage notations only helps if you have a meter to make DC-voltage measurements.
Troubleshooting is a process of identifying what's not broken, one circuit section at a time. Hard to do without a diagram and the means to make some measurements. The two transistors on the back panel are there to power the radio from a 12-Volt DC source. They are not active when running it from the AC power cord.
This particular radio model came from Panasonic. They put different name badges on versions of this radio sold by Robyn, Teaberry, Colt, Gemtronix and others. It was a decent performer when it was new, but it would age rapidly, in part because it runs hot inside. High temperatures age the components faster. The way it's built isn't particularly end-use friendly. Maintaining one of them calls for a lot of labor to work around the glued-down tuning adjustment slugs.
My experience is that it will be an uphill slog unless you get lucky.
73
Attachments
no the tune and load is not on the bottom ,,, it is on the left side looking to the back of radio,, a copper coil is on one side a couple of tubes on other side,,,Yep, I jumped the pins for 12v operation just like the schematic shows, the tubes would glow in standby but the radio did nothing more when turned on off 12v operation. Yes, I think I know which tune and load coils you were referring to on the bottom of the radio and I was able to get the paint loose and the barrels freed without any damage but adjusting them only lowered the power output even more, thanks for the help as it is appreciated

Yes sir, I found them as someone had them screwed all the way down, I do believe I also had a couple weak tubes but the radio is definitely back to pushing it's desired 4 watts ! Now I will probably go ahead with replacing the caps in the unit as they are all originals and it is obvious that this radio is in definite need of some sort of cooling fan, I am going to try to find a nice way of mounting one without drilling any holes or defacing the radio in any way I may try to utilize the rear vent someway, I think a person could actually cook hot dogs on this thing, too much heat not being dispersed, thanks againno the tune and load is not on the bottom ,,, it is on the left side looking to the back of radio,, a copper coil is on one side a couple of tubes on other side,,, View attachment 61007

