• You can now help support WorldwideDX when you shop on Amazon at no additional cost to you! Simply follow this Shop on Amazon link first and a portion of any purchase is sent to WorldwideDX to help with site costs.
  • Click here to find out how to win free radios from Retevis!

Refurbishing D104 T-UP9 Microphone

NightThumper

South of Pittsburg
Nov 8, 2017
655
1,554
153
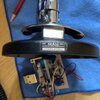
Recently pickup this microphone. I’ve fixed several wiring/solder issues, pinched wires, wire strands on circuit board, cleaned the relays, stopped them from squeaking and I believe the 5k potentiometer is bad. The mic element is in fine shape and working great as tested on my other D104 mics.

Used a Jonard OB-1/3 burnisher tool on the contacts along with Deoxit D5.

Here’s the parts list. Planned on only replacing the capacitors unless forum wisdom says otherwise.

1. 5K Ohm Horizontal Slotted Wheel Trimmer Potentiometer
2. 4.7 uF axial capacitor
3. 47 pF capacitor
4. .1 uF capacitor
5. .01 uF capacitor
6. #102 capacitor

Any suggestions while I have it torn down?

Brad
KE0XS
South of Pittsburg

upload_2021-8-27_11-21-29.jpeg
upload_2021-8-27_11-21-59.jpeg

upload_2021-8-27_11-22-25.jpeg
 
Last edited:

Only one suggestion . . .
To replace the felt on the bottom, of course, you can get that at any fabric shop and is very cheap (about $1). Scrape the old felt off with a paint scraper and sand off with a jitterbug sander. Apply an even coat of contact cement on the bare plate and let tack dry. Put the new felt on and trim. Use an X-Acto knife to trim the pot adjustment hole and the chamfered screw holes; it pays to use a fresh blade. Takes 10-20 min - tops. Easy!
Color of felt is up to you; but black looks the best with all of that chrome - IMO . . .
But I've seen some red, blue, or green - too.

Just the electrolytic caps should be replaced!
 
Last edited:
Ditch the transistors in the preamp for a FET circuitCheck the attachment file

Good read…I have seen that mod. Thanks for the post. Since the mic is being used on a Galaxy DX99V2 I’m not concerned about frequency response/impedances. It serves it’s purpose perfectly as it is in the original configuration.

Waiting for the parts to arrive sometime next week. Should only take a couple of hours to do the refurb.

Still looking for the value of that choke on the amp board….Google is tired of me hammering the search engine…LOL. If all else fails I’ll pull it from the board and measure it with my LCR.
 
Refurb of my cica 1978 D104 T-UP9 is finished and works beautifully again. After the felt was scraped off with a putty knife, took a soft brass wire brush wheel on my drill and cleaned the remaining felt off. Then wiped down with alcohol before applying felt.

Parts List:
1. 5K Ohm Horizontal Slotted Wheel Trimmer Potentiometer
2. 4.7 uF axial capacitor
3. 470 pF capacitor
4. 0.1 uF capacitor or known as a 104
5. .01 uF capacitor
6. 1000pF or known as a 102 capacitor
7. Two 2N2712 transistors
8. New black felt pad and screws
upload_2021-9-3_15-54-12.jpeg
upload_2021-9-3_15-57-28.jpeg
upload_2021-9-3_15-57-57.jpeg
upload_2021-9-3_15-58-59.jpeg
upload_2021-9-3_15-59-25.jpeg
upload_2021-9-3_16-9-10.jpeg
 
Last edited:
Nice job Brad!

looks really nice.

you might have already done this, but i always use a soldering iron to make the new holes in the new felt on the bottom.
keeps the edges from fraying.

im sure you have the mic all put back together by now, but i will include these two tips for those who may stumble across this thread later.

first, a small ferrite bead on the audio wire right where it meets the switch helps keep the squeals away, and a second one right where the audio wire meets the PC board will help even more. use a bit of contact cement to keep them from rattling around.

next, pay close attention to how and when the switch contacts are changing states when you press down on them.

you want your receive wire to disconnect from ground just before the TX wire makes contact with ground, and you want your audio wire to make contact just after the TX wire gets grounded.

When you release pressure on the switch or "unkey", you want the TX wire to break its connection before the RX wire gets grounded.

doing this will keep the mic from popping in your receiver when you key and unkey.

I am all for keeping every single D104 that still exists in tip top shape for as long as we can.

I am also a big fan of the J-fet mod, but for a radio with a stock audio frequency response, the stock D104 circuit works wonderfully.

LC
 
LC, great advice as always! I knew about using a soldering iron on the felt as well as using a “hole punch”.

I may go back in and add the ferrite beads as you pointed out although there are no squeals.

I closely watched the connect points with a magnifier head set. In addition I’ve listened closely on a monitoring radio for those pops in the receiver and when keying up.

Thanks for the flowers…ie kind words.

Brad

There was one really bad capacitor out of 5 and a couple of suspect ones….it was the 4.7uF axial. Here’s the measurement on that 4.7uF
37E1ADAE-9342-4BDC-B91C-2053AB96D008.jpeg
 
Last edited:
@NightThumper

Excellent thread! I just replaced the 4.7u electrolytic cap on my Special, mine was high off the chart ESR. Someone also wired the negative battery connector to the wrong place bypassing the on off switch which results in a dead battery. I think some people don't even look at the schematic on how these work LOL

Thanks so much for posting pictures as I have the same PC-100 board and was looking for this exact information!!

@Pioneer621 In Another thread, you advised to use an amp meter to verify on/off that was great info. That helped me isolate the wiring issue. THANKS!

THANK YOU All!!
 
Last edited:

dxChat
Help Users
  • No one is chatting at the moment.