• You can now help support WorldwideDX when you shop on Amazon at no additional cost to you! Simply follow this Shop on Amazon link first and a portion of any purchase is sent to WorldwideDX to help with site costs.
  • Click here to find out how to win free radios from Retevis!

Gonset GSB-201, "Frame-Up" restoration --- A SAGA

GlocknSpiel

Well-Known Member
Mar 19, 2022
108
129
53
71
SW Florida
Gonset GSB201 Moderniziation.
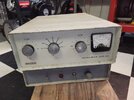
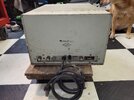
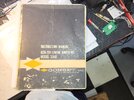
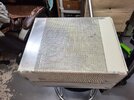
YEARS ago, (1995 I think), I picked this old girl up at a local tailgate, and it came with the original manual. I traded an old Kenwood TS-7500 2 meter rig for it. As you can see in the pics, this amp was very rough, but I'm just attracted to 'old iron'. And at 81Lbs, this sure fits that bill just fine. I brought her home, hoisted it up on my heaviest bench, and brought it up on the variac. I recall that I got around 400W full-drive from it before backing away from it. While staring certain death in the face the whole time, I didn't want to "push any envelopes"... I was SO afraid of it after a day's worth of tinkering with it, that I built a sturdy dolly for it, and wheeled it under the bench, never to see daylight again.... Until today.

I'm sorry, but this is truly going to be a "saga", y'all., to be updated as I make any progress on it. But it's a flat mess. I plan to not only get her chooching again, but I intend to modernize the circuit as best I can as I go. I'm documenting this process here because I'm sure that if I'M willing to do this, there are other radio heads with these sweet old boatanchors under their bench. So let's do this!
I just hope my skill level is up to the task!

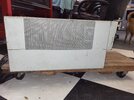
Here it is, in all of it's present OEM glory. I know, it's fugly. Outside of a new paint job at some point during this project, it'll likely remain fairly fugly. But I see an 81 pound "diamond in a cesspool".
 

Attachments

  • 20240312_200627.jpg
    20240312_200627.jpg
    2.6 MB · Views: 92
  • 20240312_200703.jpg
    20240312_200703.jpg
    2.7 MB · Views: 90
Last edited:

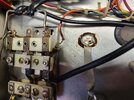
After removing the armor, I gave the innards a good visual, pulled the tubes, and checked for obvious issues. I found the relay contacts to be FUBARed, and a wire dangling at the main comp board (at least, I THINK that's where it came from). I think it's bias because it comes from the relay on a "keyed" contact. Although this amp is not supposed to have a bias circuit from the factory, I'll have to study that later... Let the games begin!

My plans as they stand at the moment are as follows;

  • Install a new set of 811A's from Penta Labs. I never pulled these old tubes before now, and SHOULD HAVE! They were all operating back in 1995, but the anodes are visibly melted on all of them. "Ca-ching" right outta the chute! $200 and they're en-route.
  • Install an input tuning network... Yep, these never were made with one. Hard to imagine!
  • Install a low-voltage T/R relay and "softkey" capabilities.
  • Install new HV filter bank and bridge/bleeder network.
  • Install a bias circuit. They never had one of those either when built, but this one may have an existing mod. I haven't researched that fully yet.
  • Install AGC (maybe).
  • Install a 12-3 power cord and fusing in the A/C mains.
  • Install "soft start". It needs it.
  • Install gas discharge tubes to the filaments to ground (per W8JI's advice).
  • Ground the grids directly (also per W8JI's recommendation).

I'll be using off-the-shelf modules for most of these mods, as I'm not equipped to make my own PCB's, nor do I want to spend the time to fabricate them. This project will likely take more time than I want to spend on it in the first place.


First steps; I've begun to strip her down to a point where I can fully clean the chassis.
 

Attachments

  • 20240326_193716.jpg
    20240326_193716.jpg
    2.8 MB · Views: 75
  • 20240329_155409.jpg
    20240329_155409.jpg
    3.8 MB · Views: 96
  • 20240325_225854.jpg
    20240325_225854.jpg
    3 MB · Views: 94
  • 20240325_225914.jpg
    20240325_225914.jpg
    3 MB · Views: 94
  • 20240312_201754.jpg
    20240312_201754.jpg
    1.7 MB · Views: 75
  • 20240312_200644.jpg
    20240312_200644.jpg
    2.9 MB · Views: 87
Last edited:
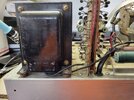
That was "big iron" 60 years ago. Here's hoping the transformer was treated well the last six decades.

If you could get them, a set of 572B tubes should last a long while, so long as you run it from 240 Volts.

Best guide to how stout your AC power source is will be to watch the color of the filaments. If the color changes when it's delivering power, this suggests that there is a voltage drop issue. This can weaken the tubes prematurely, running the cathodes below their rated temperature.

73
The transformers in these old Gonsets have no provision for 240V input. Strictly 120V. I have a set of Penta 811A's en-route, but I don't plan to keep this amp. I just wanted to turn it into a daily driver for someone. I kicked-around the thought of simply "mono-banding" it, but wanted to play around with these newfangled ATU-100 autotuner boards in place of an input tuning network. This is about as good a "test bed" as anything else, I guess.

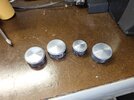
I polished up the knobs a couple weeks ago and they turned out like new.
 

Attachments

  • 20240326_202113.jpg
    20240326_202113.jpg
    3.3 MB · Views: 90
  • 20240329_155141.jpg
    20240329_155141.jpg
    3.4 MB · Views: 95
Last edited:
CHASSIS TEAR-DOWN & CLEANING COMPLETED;
I have the chassis down to the frame, minus the tank circuit up front, and EVERYTHING sticking out of the back. NAS-TEE!

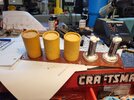
I pulled the power supply filter board and stripped it down. Two of the five 100K bleeders are out-of-spec. The caps all checked good --- believe it, or not! Mallory made reliable stuff back then! One did show some 'oozing' at the base.
I cut the cap cases at the base and cleaned the electrolyte out of them. I drilled two holes in them for the new cap leads and installed the new caps. The leads are soldered to the cap tabs on the back of the PCB.
I trimmed the cardboard covers to the length of the new caps plus old cap bases. and now, I'm waiting on new bleeders to arrive.
 

Attachments

  • 20240405_003012_resized.jpg
    20240405_003012_resized.jpg
    857.1 KB · Views: 103
My back hurts looking at that thing. Makes me wonder if there was a contest to build heavy 811a amps that i was unaware of. The heathkit warrior was way too heavy to make the power it did.
I hear ya! It needs caster wheels instead of rubber feet for sure. I've kicked around the idea of installing a ceiling hoist in the shop, just to get some of this iron up on an engine stand!:sneaky:
The armor ALONE on this Gonset is 2mm thick, and weighs about 11Lbs --- by itself! Overbuilt to the extreme. The chassis, of course, is heavy gauge steel also. Then, those two transformers.
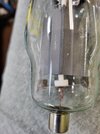
Progress has been good this week, but the quad set of tubes I ordered from Penta Labs need to be returned due to defects/damage.

Scott, Penta Labs' commerce manager, replied first thing Monday morning to address this. He is in-agreement with their engineer and me, that this one particular tube is not right. and a couple others might not be. Scott issued an RMA to return the entire set and cautioned me about even trying them out in the amp. This thing is in pieces anyhow, so that was never in the cards.
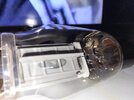
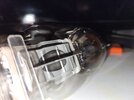
Look at the pic and notice the top filament spreader and the top of the anode plate........
 

Attachments

  • 20240406_140657_resized.jpg
    20240406_140657_resized.jpg
    753 KB · Views: 92
Last edited:
I hear ya! It needs caster wheels instead of rubber feet for sure. I've kicked around the idea of installing a ceiling hoist in the shop, just to get some of this iron up on an engine stand!:sneaky:
The armor ALONE on this Gonset is 2mm thick, and weighs about 11Lbs --- by itself! Overbuilt to the extreme. The chassis, of course, is heavy gauge steel also. Then, those two transformers.
Progress has been good this week, but the quad set of tubes I ordered from Penta Labs need to be returned due to defects/damage.

Scott, Penta Labs' commerce manager, replied first thing Monday morning to address this. He is in-agreement with their engineer and me, that this one particular tube is not right. and a couple others might not be. Scott issued an RMA to return the entire set and cautioned me about even trying them out in the amp. This thing is in pieces anyhow, so that was never in the cards.
Look at the pic and notice the top filament spreader and the top of the anode plate........
Great guys at penta. I buy loads from them. Even the big stuff has been great in spite of the naysayers
 
Great guys at penta. I buy loads from them. Even the big stuff has been great in spite of the naysayers
Very true. He wasted no time getting back to me on this. But I'd be looking into their testing/matching dept to find out how this got past them, much less, why it didn't smoke their diagnostics gear when they plugged this puppy in. I'm sure Scott is "on it" now though hh.
 
I don't have much to report this week.
THE TRIP TO OUR 'PAINT & BODY' DEPT (my back porch);
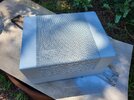
I've put the armor on the 'back burner' until now because I had too many other 'honey-do's' to complete while it's still tolerable outside.... I do DOODLY outdoors in the summer due to the brutal heat n humidity, outside of driving a lawn tractor around the lawn once a week. I did want to get this knocked-out, so here goes.
I think the OG paint is enamel, but not sure. Anyhow, I got the case sanded and third primer coat on it.
I'm going to wait a few days before wet-sanding and painting because the primer doesn't seem to be curing like it usually does. I probably laid the coats down too thick. But I want to avoid 'rolling' it up on the paper instead of leveling it.
 

Attachments

  • 20240412_093928_resized_1.jpg
    20240412_093928_resized_1.jpg
    1.1 MB · Views: 83
  • 20240415_131653_resized_1.jpg
    20240415_131653_resized_1.jpg
    385 KB · Views: 65
  • 20240415_131825_resized.jpg
    20240415_131825_resized.jpg
    228.4 KB · Views: 60
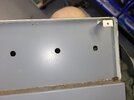
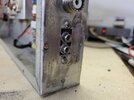
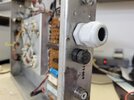
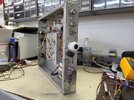
The chassis is back from the machine shop (my tool shed). I removed the old relay connector and replaced it with two RCA sockets, added a new power cord chassis grommet, and an AGC fuse holder.
I also directly-grounded the tube socket grid pins this week.
There's still no word from Penta about the tubes. USPS tracking places it at the "Front Desk" of a post office in California.... I'm starting to get a tad "unsettled" about that..
 

Attachments

  • 20240423_213543_resized.jpg
    20240423_213543_resized.jpg
    217.7 KB · Views: 66
  • 20240423_213549_resized.jpg
    20240423_213549_resized.jpg
    175.6 KB · Views: 59
  • 20240423_213555_resized.jpg
    20240423_213555_resized.jpg
    279.8 KB · Views: 55
Last edited:
I got the tubes back from Penta Labs yesterday and they sure look better than the first set. Not too likely, but if I ever buy any more Penta tubes, they will be direct from the lab, rather than their ebay source. This way, I stand a better chance of getting a set of tubes that were really tested before they leave. The ebay store doesn't make the same claim that they're "Tested", and these clearly, could NOT have been.... Because that one in the pic a couple posts back would've smoked their hi pot tester ASA they threw the juice to it.
And it cost me an additional 3 weeks and $42 shipping just to get them them to/from Ca for the exchange --- so the set of tubes cost more than $243. I realize that RF Parts' 811's are from the same source, but I'll probably just go back to RF Parts in the future.
 
Last edited:
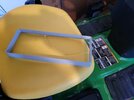
I'm not really as far-along as this might look, but the faceplate is done, and mounted so I can lay-up the chassis standoffs for the three PCB's I still have to mount and wire-in.
Once those are mounted, I should be able to proceed with the transformers, diode board and wire-up. At least, you can see where the input status and tuning are set up on the panel. It's a good thing I bought two of those ATU100 tuners and from two different people... ONE of them is a real dog, while the other works great.
I'll likely toss the dog in the trash after scrounging the relays out of it.
 

Attachments

  • 20240509_120338_resized.jpg
    20240509_120338_resized.jpg
    185.1 KB · Views: 53
  • Like
Reactions: lonestarbandit
I had to pull out the 'heavy artillery' to move a tank ground strap out of the way of one of the tuner mounting standoff holes.
"That isn't a soldering iron, mate"......
 

Attachments

  • 20240509_192742_resized.jpg
    20240509_192742_resized.jpg
    300 KB · Views: 53
  • Like
Reactions: lonestarbandit
".....The ebay store doesn't make the same claim that they're "Tested", and these clearly, could NOT have been...."

Their 3-500ZG I got from their ebay source scared the you know what out of me when I turned it on the 1st time.... crazy arc and spark internally for the first few key attempts ... I was about to fire off a panicked email....oh there was swearing... but then it just settled down tuned up and right as rain after. Still kinda the same feeling as you. If it was tested... they would have seen that...but works great now. That beast is coming along! Looks good but my back hurts just looking at it.
 
  • Like
Reactions: GlocknSpiel

dxChat
Help Users
  • No one is chatting at the moment.
  • @ Mark Malcomb:
    Hello BJ. Been a long time since I've been on. You doing well? Mark Malcomb
  • @ Naysayer:
    I’m
  • @ kingmudduck:
    Hello to all I have a cobra 138xlr, Looking for the number display for it. try a 4233 and it did not work