Previous article: http://www.worldwidedx.com/installa...itizens-band-radio-export-radio-part-4-a.html
Summing up . . .
So by now we know what mic and preamp we want and have either purchased a Heil cable or built one out of stuff we already had. Hopefully, we also have chosen a really fine mic and didn't spend too much. Some Hams have spent $3000-5000 on their audio chain alone, incorporating a mixer, high-end preamp, reverb unit, compressor, noise gate, and limiter. The simplicity and cost of a professional mic and preamp alone will do more than enough to get real hifi sound without resorting to this extreme. Don't even bother going farther than this simple arrangement, unless you want to take the time and toils to understand professional sound systems and recording gear. It can take a lot of cash and time too and little benefit will be realized - unless you just want to compete with others that have gone the distance and feel you want to explore some more.
There are usually two knobs on a preamp; one controls the mic gain into the preamp and the other controls the output the goes into your radio. When setting the gain on the preamp input; be sure to start with the mic level @ 12 or 1 o'clock. When adjusting the output control, just keep the output knob/level barely cracked open. Too much output power from the preamp into your radio can also pop the preamp that is already in your radio. Most radios have a mic gain control; keep it set fairly low as well. Just use and watch your modulation meter so that it doesn't exceed 100% modulation. You can do this by simply giving it the 'ahhhhh' sound into the mic from 4 inches away - and then adjust the preamp output to ensure 100% modulation. This is an important thing to do; as nice audio needs to be clean in order to be effective with the gear you are now using.
Other items to be considered . . .
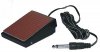
A push to talk switch - either by hand or foot - is necessary. You can take a simple $.50 SPST momentary switch and wire it to the jack on the cable as Heil does with their cables (that is how I made my own cable - BTW). Or - even wire it right into the radio's mic plug itself and then drill/mount it in the mic stand if you want. I use a TASCAM tape recorder cue footswitch that is spring loaded and already has the 1/4 inch male plug/cable on it; it looks just like the MFJ footswitch. But MFJ and Heil make both the footswitch and handheld push to talk switches. They cost around $30-40; but you can really do this portion for next to nothing if you want to save the bucks.
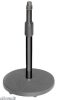
A desk mic stand will also be necessary when using a pro mic. There are many different kinds/models; most any will work. A simple $15/new or $5-10/used mic stand will do; no real need to spend more than necessary. Some hams gos as far as using a overhead extendable/retractable - which is nice but will cost quite a bit too. I use a simple desk mic stand with my condenser mic and paid only $15, it works just fine and I am quite pleased with it as it is.
Another item that I consider necessary, is a mic wind screen. They cost anywhere from $15 to $40 and work equally well. They are a low tech device that gives a high tech result. That fine mic you've chosen will benefit greatly by having a windscreen that will remove the 's', 'p', and 'b' wind blasts. This will keep your audio as smooth as silk and won't break the bank. Recommended. You can also build your own out of some panty hose and a needlepoint form; but it is really easier to buy one right off of the shelf for the amount of money you have to spend ($15) vs the work to make your own. Mount it 1/2 inch away from the mic and then you can get up close to the mic without blasting it with wind from your mouth as you speak. Don't even bother with the foam style wind screens; they just don't work as well - even for a dynamic type mic.
Options . . .
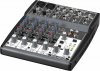
One can opt for a small mic mixer - like the Berhinger 4 channel mixer - instead of a stand alone mic preamp that we've already discussed. This will offer a two band EQ, phantom power for your condenser mic, and has an 'effects loop/'buss' that allows for other devices to be inputted with your sound with (you can adjust the wet/dry level that will control the percentage of effects that you put into this loop). Such as adding a reverb unit, a compressor, limiter, or noise gate. It is advisable to run the the compressor/limiter/gate after the mixer; then run the reverb unit through the effects loop ('send' and 'return') in the mixer for best results.
These mixers doesn't have 'tube emulation' for that nice tube sound; but the preamp it provides will be very clean with a lot of gain. You will only need to use one of the four channels it provides; but the buss it has as an extra allows for using more outboard gear (compressor, reverb, etc...) They only cost between $50-60 and are necessary if you do plan to expand your audio capabilities. It will use the same cord you made, as it has a balanced output. You can also use the mixer's built-in head phone output to monitor what it sounds like as it is going on the air.
It is the outboard audio gear that you might use with the mixer that will get expensive. A nice and modestly priced reverb unit would be a Lexicon for $200. Or you can opt for the lower priced Alesis Miniverb and spend less than a $100. A compressor/limiter/gate made by Alesis can be found for $125/used and will provide dedicated functions that can improve the audio. But these are the lower cost items; as many high end audio components for a professional sound ramps up very quickly. The best condenser and a decent preamp will still be 90% of what will be heard - go with a quality condenser and forget the rest. Or you might find yourself as an audio junkie spending thousands on the audio gear and only a fraction of that on the radio.
Conclusions . . .
IF you have done this all correctly, the regulars that you talk to daily will notice a vast change in your sound and say so. If you made the cables and footswitch yourself; then you probably did this project for less than or about $150-200. Some may spend more; but that is too easy to do. If you stuck to my recommendations for mics - you should be on target with the budget. I hope you had as much fun as I did building mine and enjoying the compliments of a very clean audio transmit that lacks coloration - yet an abundance of natural sound. It should sound like you are standing in the same room with them - if conditions are decent and their receive is capable of it.
Many Cobra/Uniden radios are capable of high quality audio transmit. Many Export radios are too. If your radio doesn't transmit as well as it could after these improvements; then chances are it wasn't very good to begin with. Regardless of what radio you do use; the improvements made should be very noticable. If they aren't you can opt to use another radio or have it looked at by a tech to see if it is performing as it should. Most techs can also improve the transmit audio as well as the receive audio bandwidth.
I use a different cable hook up with the same mic and preamp for my Ham radio. The Kenwood has an ACC2 plug on the back that will bypass the onboard Kenwood mic preamp. An external preamp will always work better and cleaner. Some late model Icoms and Yaesus have a similar ACC2 plug as well. So, if you do get your Ham license, you can also use these concepts and materials on a Ham rig with great results too. Until then, you can enjoy transmitting on CB - with a legal and better audio - for only slightly more money that you would have spent for that Silver Eagle or Turner+3.
Enjoy . . .
Top:
Behringer 4 channel mic mixer
Bottom left to right:
MFJ foot switch
Mic stand
Wind screen
Summing up . . .
So by now we know what mic and preamp we want and have either purchased a Heil cable or built one out of stuff we already had. Hopefully, we also have chosen a really fine mic and didn't spend too much. Some Hams have spent $3000-5000 on their audio chain alone, incorporating a mixer, high-end preamp, reverb unit, compressor, noise gate, and limiter. The simplicity and cost of a professional mic and preamp alone will do more than enough to get real hifi sound without resorting to this extreme. Don't even bother going farther than this simple arrangement, unless you want to take the time and toils to understand professional sound systems and recording gear. It can take a lot of cash and time too and little benefit will be realized - unless you just want to compete with others that have gone the distance and feel you want to explore some more.
There are usually two knobs on a preamp; one controls the mic gain into the preamp and the other controls the output the goes into your radio. When setting the gain on the preamp input; be sure to start with the mic level @ 12 or 1 o'clock. When adjusting the output control, just keep the output knob/level barely cracked open. Too much output power from the preamp into your radio can also pop the preamp that is already in your radio. Most radios have a mic gain control; keep it set fairly low as well. Just use and watch your modulation meter so that it doesn't exceed 100% modulation. You can do this by simply giving it the 'ahhhhh' sound into the mic from 4 inches away - and then adjust the preamp output to ensure 100% modulation. This is an important thing to do; as nice audio needs to be clean in order to be effective with the gear you are now using.
Other items to be considered . . .
A push to talk switch - either by hand or foot - is necessary. You can take a simple $.50 SPST momentary switch and wire it to the jack on the cable as Heil does with their cables (that is how I made my own cable - BTW). Or - even wire it right into the radio's mic plug itself and then drill/mount it in the mic stand if you want. I use a TASCAM tape recorder cue footswitch that is spring loaded and already has the 1/4 inch male plug/cable on it; it looks just like the MFJ footswitch. But MFJ and Heil make both the footswitch and handheld push to talk switches. They cost around $30-40; but you can really do this portion for next to nothing if you want to save the bucks.
A desk mic stand will also be necessary when using a pro mic. There are many different kinds/models; most any will work. A simple $15/new or $5-10/used mic stand will do; no real need to spend more than necessary. Some hams gos as far as using a overhead extendable/retractable - which is nice but will cost quite a bit too. I use a simple desk mic stand with my condenser mic and paid only $15, it works just fine and I am quite pleased with it as it is.
Another item that I consider necessary, is a mic wind screen. They cost anywhere from $15 to $40 and work equally well. They are a low tech device that gives a high tech result. That fine mic you've chosen will benefit greatly by having a windscreen that will remove the 's', 'p', and 'b' wind blasts. This will keep your audio as smooth as silk and won't break the bank. Recommended. You can also build your own out of some panty hose and a needlepoint form; but it is really easier to buy one right off of the shelf for the amount of money you have to spend ($15) vs the work to make your own. Mount it 1/2 inch away from the mic and then you can get up close to the mic without blasting it with wind from your mouth as you speak. Don't even bother with the foam style wind screens; they just don't work as well - even for a dynamic type mic.
Options . . .
One can opt for a small mic mixer - like the Berhinger 4 channel mixer - instead of a stand alone mic preamp that we've already discussed. This will offer a two band EQ, phantom power for your condenser mic, and has an 'effects loop/'buss' that allows for other devices to be inputted with your sound with (you can adjust the wet/dry level that will control the percentage of effects that you put into this loop). Such as adding a reverb unit, a compressor, limiter, or noise gate. It is advisable to run the the compressor/limiter/gate after the mixer; then run the reverb unit through the effects loop ('send' and 'return') in the mixer for best results.
These mixers doesn't have 'tube emulation' for that nice tube sound; but the preamp it provides will be very clean with a lot of gain. You will only need to use one of the four channels it provides; but the buss it has as an extra allows for using more outboard gear (compressor, reverb, etc...) They only cost between $50-60 and are necessary if you do plan to expand your audio capabilities. It will use the same cord you made, as it has a balanced output. You can also use the mixer's built-in head phone output to monitor what it sounds like as it is going on the air.
It is the outboard audio gear that you might use with the mixer that will get expensive. A nice and modestly priced reverb unit would be a Lexicon for $200. Or you can opt for the lower priced Alesis Miniverb and spend less than a $100. A compressor/limiter/gate made by Alesis can be found for $125/used and will provide dedicated functions that can improve the audio. But these are the lower cost items; as many high end audio components for a professional sound ramps up very quickly. The best condenser and a decent preamp will still be 90% of what will be heard - go with a quality condenser and forget the rest. Or you might find yourself as an audio junkie spending thousands on the audio gear and only a fraction of that on the radio.
Conclusions . . .
IF you have done this all correctly, the regulars that you talk to daily will notice a vast change in your sound and say so. If you made the cables and footswitch yourself; then you probably did this project for less than or about $150-200. Some may spend more; but that is too easy to do. If you stuck to my recommendations for mics - you should be on target with the budget. I hope you had as much fun as I did building mine and enjoying the compliments of a very clean audio transmit that lacks coloration - yet an abundance of natural sound. It should sound like you are standing in the same room with them - if conditions are decent and their receive is capable of it.
Many Cobra/Uniden radios are capable of high quality audio transmit. Many Export radios are too. If your radio doesn't transmit as well as it could after these improvements; then chances are it wasn't very good to begin with. Regardless of what radio you do use; the improvements made should be very noticable. If they aren't you can opt to use another radio or have it looked at by a tech to see if it is performing as it should. Most techs can also improve the transmit audio as well as the receive audio bandwidth.
I use a different cable hook up with the same mic and preamp for my Ham radio. The Kenwood has an ACC2 plug on the back that will bypass the onboard Kenwood mic preamp. An external preamp will always work better and cleaner. Some late model Icoms and Yaesus have a similar ACC2 plug as well. So, if you do get your Ham license, you can also use these concepts and materials on a Ham rig with great results too. Until then, you can enjoy transmitting on CB - with a legal and better audio - for only slightly more money that you would have spent for that Silver Eagle or Turner+3.
Enjoy . . .
Top:
Behringer 4 channel mic mixer
Bottom left to right:
MFJ foot switch
Mic stand
Wind screen